Featured Products

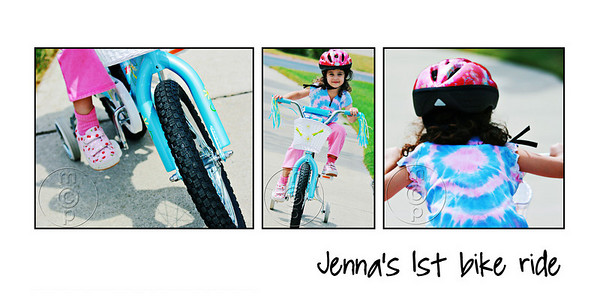
Since posting the DAD freebie and then my storyboard on some photography forums, I have gotten questions about how to make a storyboard. The finished product is above.
To start making a new template/storyboard, go under FILE – NEW.
In order to cut holes into your canvas, you need to rename your background layer so it is editable. To do this, double click on the word “background” and name it template. Then you will use your marquee tool to make the boxes (squares, rectangles, etc) where the photos can go time after time.
If you want to line up things perfectly, you can use VIEW – NEW GUIDE. Then you will pick where you want guides and it will line guides up for you to work from. You can add these both horizontally and vertically.
Once you have your guides, or if you do not want to use guides, select the marquee tool. Make your boxes where you want photos to go. Once you have a box done, click delete on your keyboard. It will then look like a checkerboard underneath. This means it is transparent. And a picture can be placed underneath. Add as many holes as you want.
If you want to add a border around each, this is what you do next.
Next go under EDIT – STROKE. That will pull up this dialog box:
Now when you click ok – you will have your border. If it is too thick or thin, go back and do it again with a larger or smaller number.
Make sure to save your file as a PSD. You can change the color of the background or the stroke by selecting the appropriate layer and dumping paint from the paint bucket into the area. You can also turn off the border for a more simple storyboard.
No Comments
Leave a Comment
You must be logged in to post a comment.


Thanks Jodi,
Some much love is coming your way for this.
Great tutorial as always! 😀
This is so awesome! I have always wondered how to do this. Thank you so much for taking the time to type out how to do things like this. I have your blog on my favorites and look forward to your weekly posts!
Jodi, thanks so much for the tutorial, it’s awesome!!
YEA!!! I’ll be storyboarding all weekend!!!
Thanks!!!
Gabi
I cannont even say how much this tutorial has helped me. I had NO idea how to make a template. I’ve been recreating and fiddling with each and every storyboard that I’ve made. WOW does this makes things go a whole heck of a lot faster!! Hee hee! Wonderful tutorial and such simple and easy to understand instructions. I can’t thank you enough!! I look forward to the next lesson! Thanks again. Dawn
I absolutely LOVE your blog!! And thank you so much for the storyboard tut! Now I FINALLY know how to make them! They aren’t so hard (or scary) afterall!
Stacie
This is great! I’m to your blog but I have now saved it as a favorite! I ususally don’t print my own photos so I’m curious where you have a 20×10 printed? Any suggestions?
i just found your blog tonight and love it! i’m sad it’s already after midnight because i don’t want to wait until later to keep reading! thanks for posting this tutorial. very helpful.
Hi there, would you mind sharing how to insert the photos into the storyboard?
Thanks! Love your blog!
PS Sorry its so remedial of me. I’m SO new to PS!
Thanks for the awesome tutorial – I am having some problems with it though in PSE 5 – are the instructions different for that? Thanks for any help~!
I am brand new to PS, I have made my storyboard but how do I actually get my pictures on there??
You just use the move tool and drag the photo in. Then reposition in the layers palette.
I placed my first pic where I wanted it but is there a way to lock it in and start on a 2nd picture?
WOW. thank you. I also am somewhat new to ps and have a silly question. I was trying to do this last night, using a book about CS3. (I have CS4) I had all my pictures resized and with a border around them, but I couldn’t drag them anywhere. Is the drag tool the “hand”? thanks so much!
I can’t tell you how much I appreciated this tutorial! I have been trying FOREVER