Featured Products
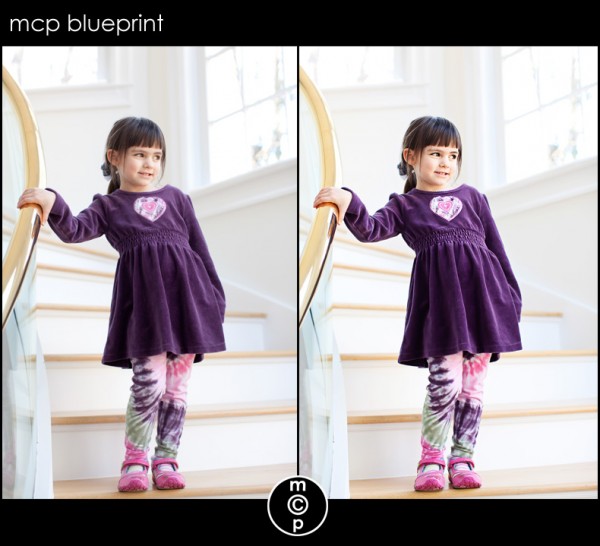
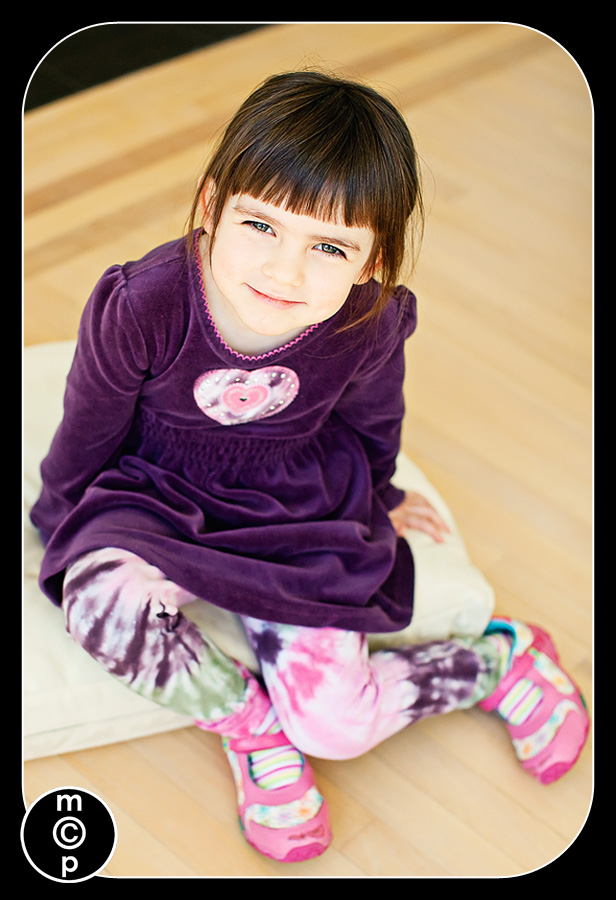
This is my niece Kaitlin. She has the sweetest eyes was such a pleasure to photograph. Her images barely needed any editing.
Details on the edit and which MCP Photoshop actions were used (straight out of camera shown 1st, then the final image 2nd):
- I started editing this shot my using Noiseware since I shot at a high ISO (ISO 1,000). I used the default portrait settings on a duplicate layer and reduced the opacity to 50%.
- Next I ran Crackle from the Quickie Collection to give the photo some dimension.
- Then I ran the Color Burst action from the Complete Workflow Set. I kept all layers at the default opacity.
- I wanted to enhance the eyes, so I ran the Eye Doctor action.
That was it – super quick and easy. The edit is very subtle, which was what I was going for. Just a clean, sharp image that speaks for itself.
Here are a few more of Kaitlin, edited in a similar manner.
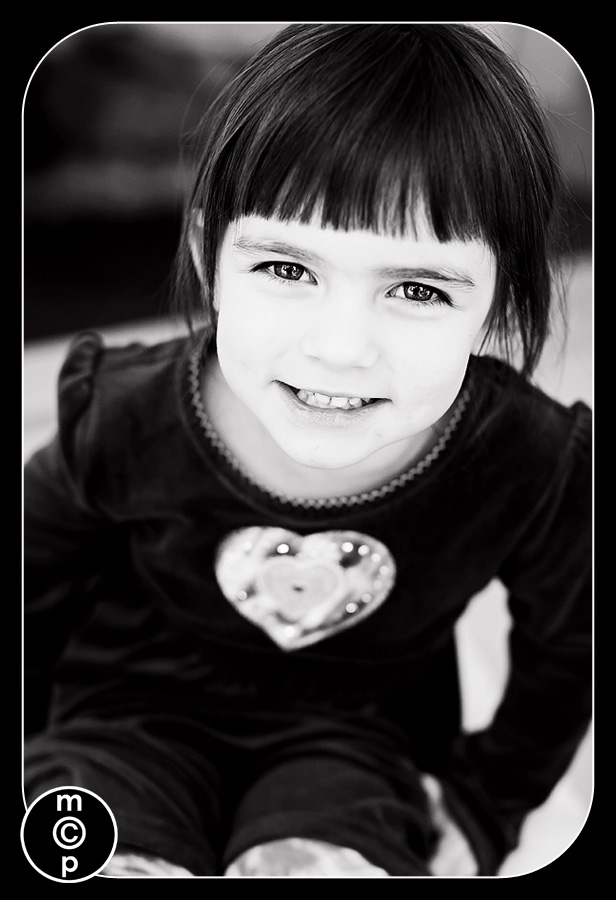
And a quick black and white, which uses same processing but adds the Vanilla Ice Cream action from the Quickie Collection.
No Comments
Leave a Comment
You must be logged in to post a comment.


Wow. Just–wow! Stunning.
wow. i love this face!great work.
From Snap shot to Portrait, very nice!
Wow Jodi! Just beautiful….Love it!
Turned out GREAT! Totally took it from a snapshot to a portrait…what a cute boy and LOVE your b/w conversion….stunning. I use your actions quite often 🙂
Amazing!! I heart Jodi!
I love tight crops and this one is great. It was also very interesting to read your technique for getting rid of a bland background. One question–did you consider removing the drop of water (spit?) on his cheek and if so, why did you decide to keep it in?
Katie – funny you asked. Yes – I totally considered it. I went back and forth- but it makes the picture way more “real” with it – plus it was not a gross looking spit or whatever – so to me it added to the emotion.Jodi
I LOVE it! When I first looked at the picture, I thought that it was a tear on his face. I like it left on!
This is really beautiful! Can you do a tutorial on extracting the background? It looks flawless! Yu are amazing!
How do you extract the background? I really love this photo and I’ve been trying to figure out FOREVER how to extract the background. I have no clue. Help?
Your fix this week was amazing Jodi. I absolutely loved the B&W with this!!~Angieco-founder of http://www.iheartfaces.com
Awesome before and after!! Another vote for a background extraction/fill tutorial!
As far as a tutorial on extraction – I may do one someday – but truthfully it is a huge mix of tools from lasso to magic wand to quick selection tool to painting on masks. There is not a one size fits all. How I would extract is totally picture dependent. The other thing is that I rarely do it because in most situations it is too time consuming to do it right. The best bet is to use a solid backdrop if you know you want to extract – way easier that way – especially if the background is not any color the subject is wearing.
Beautiful..love black & white!
I LOVE the edit. It went from hu-hum to frameable.
Fantastic enhancement and crop, Jodi!
Beautiful…and yes please tell us how you extract the background.
This is a beautiful edit! Those eyes are stunning!
Your actions are the best actions ever.
Gorgeous edit, Jodi!
So beautiful!! What a great edit!!
Just beautiful! I will definitely have to try this.
Just beautiful as usual! How did you master Photoshop? Classes, trial and error? Just wondering how you became such a rock star at it!
Pamela – all different things from classes to books, to lots and lots and lots of practice. 🙂 Practice is probably the biggest component.
FANTASTIC! I need to learn more about “masking”. Do you have any tutorials to help with understanding this? I know layers, but not sure how/when to apply a mask.THANKS, JODI!
Jodi, It’s amazing!!! I love seeing how you make things happen.
Just beautiful!
WOW… great fix. I’m loving the black and white. Those are my FAV kind of photos
WOW is all i can say too! An every-day “snap shot” turned into a brilliant portrait! How much does the photographer charge?!?
STUNNING!!
What does “crackle” do? I don’t have that one!!
Wow Gorgeous, Beautiful child – now how about a tut on the process you used for extracting the background and filling in with black
Crackle is one of the actions in the quickie collection. It gives your photo almost 3d qualities. It is amazing!!!
This is stunning, though for some reason I’m distracted by the tear. Not just in your pic, in all the Fix It Friday edits. Before I found I Heart Faces (and then your blog from that site! yay!) I thought I knew a fair amount about Photoshop, considering I’m all self taught. However, I have come to the sad realization that the more I read about how people edited their images, the more I realize that I know little to nothing about PS CS3 in comparison… and I have no idea when I’ll ever have the time to learn as much as I need or want to. *sigh*Again, just simply gorgeous!!!
PS – ditto all on how incredible your actions are.. I have almost all of them and still haven’t figured out how to use them all… I can’t wait to finally figure them all out! lol!
I love it! So impressive!!!(BTW…I assumed the drop of water was a tear and I think it adds so much…you know one of those tears that gets stuck on their face even when they are finished tearing up…so from a Mom who has a baby who cries a lot, I’m glad you left it.) 🙂
Love it! The converted image is stunning – bw makes all the difference, no distraction from the color and your eyes go right to his adorable eyes. Beautiful work!
You are amazing, Jodie!!!! Luv it!!!
wow, I need to go through my archives and try this! Thanks for the inspiration.
Wow, amazing work!!
Wow! Breath taking!! I love the B&W and tight crop.
Awesome!! What a great transformation!
I follow your blog, and iheartfaces… and when I saw this on their site earlier today, I meant to come right here and comment. This is by far, the best fix it I’ve ever seen on iheartfaces. L.O.V.E. IT!!!
This is a great tutorial….thanks so much.
Amazing! I’m in 100% agreement with Frank H. – you took a cute snapshot and made it an amazing portrait!!! I love it!!!!!!!!!!!!!!!!!!
GORGEOUS!!! What a dramatic photograph. Thanks for the tips Jody! I too vote for some background help. I’ve been playing with a few of my photographs today to extract the background like you have and so far…no dice.
Wow, it’s always inspiring to see how a snapshot can be enhanced to something even more beautiful. The end result is absolutely STUNNING
i love this blog.. thanks for sharing..
just stunning
What are the chances you would be willing to do a video tutorial on this? It is AMAZING!