Featured Products
Creating and Photographing Shaped Bokeh for the Holidays: Hanukkah, Christmas and more…
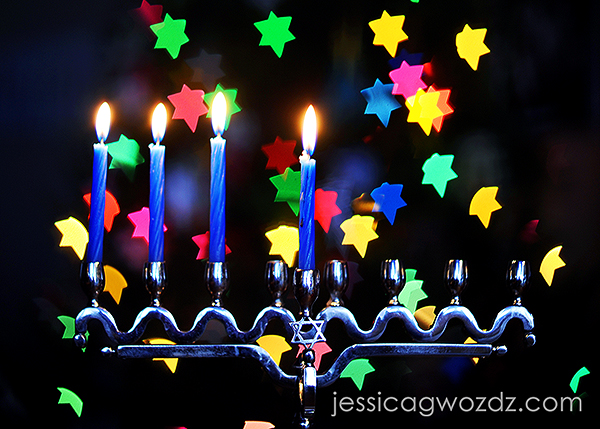
One my favorite things about taking pictures during the holiday season is all of the pretty lights that always seem to be in the background of everything I shoot. “Bokeh” can be defined as the aesthetic quality of blur, or the way a lens renders points of light that are out of focus. Everyone goes crazy for pretty bokeh, so I would like to teach you guys how to manipulate your bokeh a bit. In honor of Hanukkah, I am going to make some Star of David shaped bokeh and will walk you through how to do it, step-by-step. You can create any shape you desired, not just stars. Practice shooting Christmas lights and other lighting using this technique and various shapes. If you are not handy, or lack time, you can buy this Bokeh Kit which does the hard work for you. Here are a few more examples: Christmas lights outdoors and from a light fixture.
No photoshop is required to create the unique shapes because this is all camera work. But of course you can make your lights more colorful using Photoshop actions from MCP.
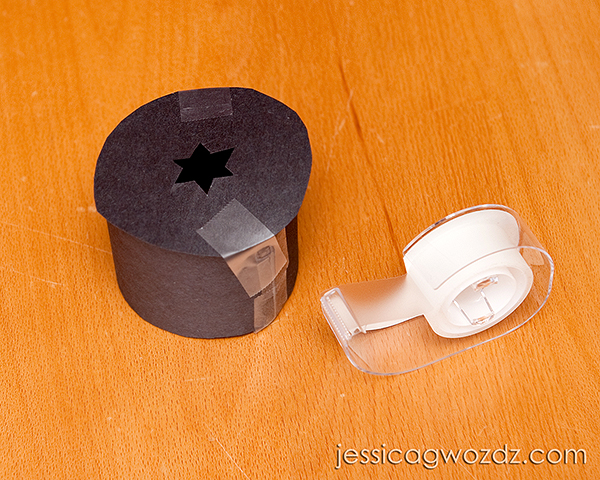
Step 1: First I need to create a homemade lens hood with the Star of David cut out of it. For this we need some black construction paper, scissors, and tape.
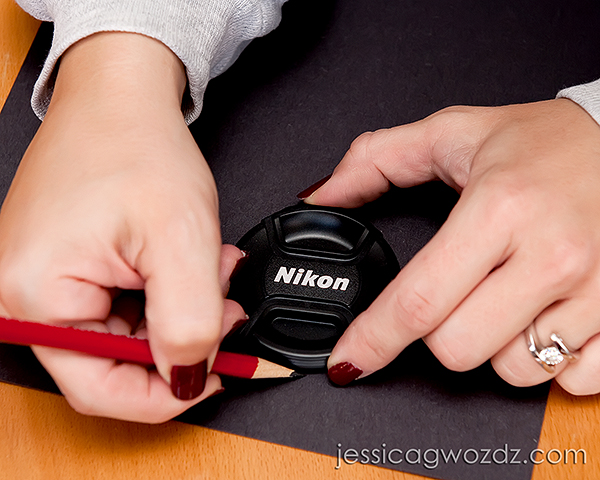
The resulting image will be best with your widest aperture lens, so choose that lens for this step. I will be using my 85mm 1.8 for this project. Trace the lens cap of that lens.
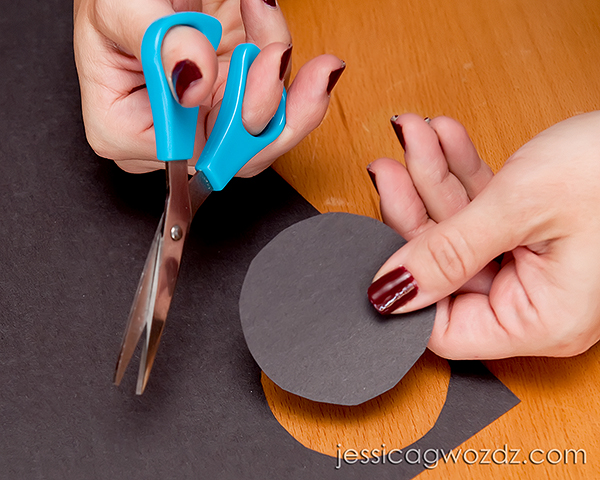
Step 2: Cut out the disc you just traced. Make sure to cut slightly larger than what you traced, as it’s better to have some paper hanging over the edges than not to have the disc be big enough.
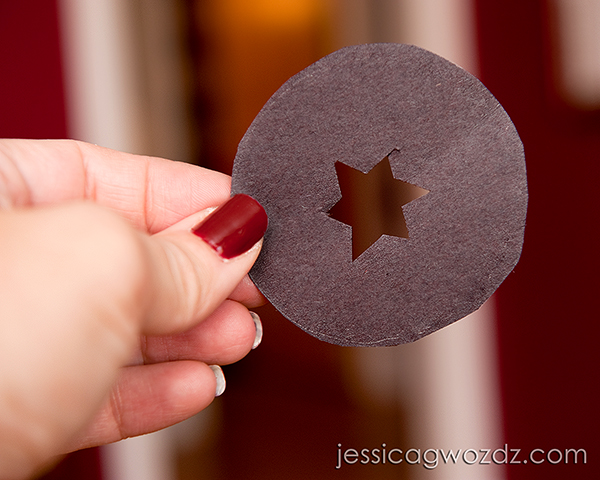
Step 3: We need to make the Star of David shape. This would be much easier if I had a scrapbooking punch, but I knew that flowchart template I had from college Fortran class would come in handy sometime. LOL! Two triangles inverted over each other: ta-da!
Step 4: Cut out your star. This does not need to be perfect. As you can see I could use a kindergarten refresher course in cutting straight lines, but this will still work fine for our purposes.
Step 5: Cut a strip of black paper long enough to wrap around your lens. Tape that strip into a cylinder, and then tape your Star of David disc on top.
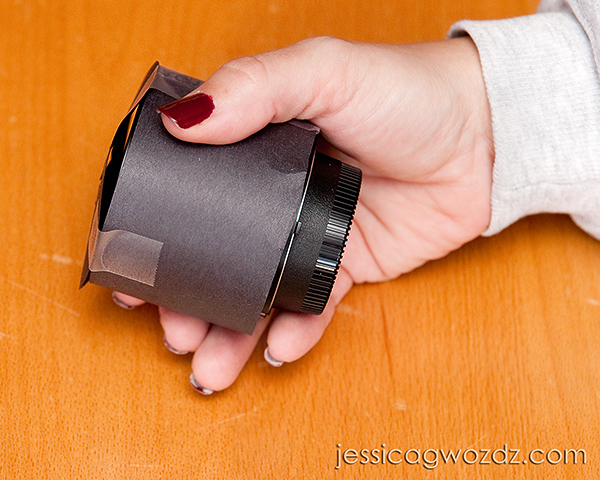
Step 6: Slide your new homemade lens hood onto your lens and attach the lens to your camera.
Step 7: Find the scene you want to shoot. You can do this anywhere that you have holiday lights. I happen to have a black couch which I think will add to the effect and really make my bokeh pop, so I will simply lay my holiday lights against the black couch. Here is a pull back so you can see my setup, extension cord and all.
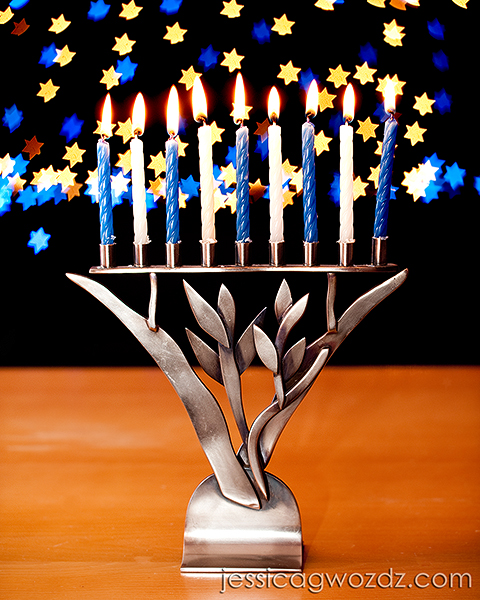
Step 8: You are ready to take your shot. Make sure to open your lens to its widest possible aperture. For this shot I closed the window blinds to make the room darker and let the holiday lights stand out more in the background. I then used a bounced on-camera flash to properly expose the menorah.
So play around a bit. It’s fun! I would love to see what you guys come up with. Link it up in the comments section if you try your own fancy bokeh shot. And Happy Hanukkah to all!
Jessica Gwozdz is a Certified Professional Photographer in Chicago specializing in studio portraiture of infants, children, and families. See more of Jes and her images at jessicagwozdz.com.
No Comments
Leave a Comment
You must be logged in to post a comment.







This is so fun! I can’t wait to try it this weekend 🙂
It’s killing me that I won’t have time to play with this for a few days at least! It looks like so much fun.I’m going to try using my craft punches in shapes; snowflakes, flowers, birds and see if that works.Thank you so much!
Craft punches…that’s a great idea!
Would LOVE to see a before and after picture using this method? I don’t have my Christmas tree up yet, or I would do it myself!! 🙂
I couldn’t wait. Will do it for real when I have more time, it will be tough!This works so well. I used a Martha bird-shaped paper punch.Thanks again!
Love the article Jes & your finished photo is fab. I cheated a little to make a quicker but more temporary version for my heart shaped bokeh (have a look on my blog) but now I’ve seen your tutorial I might just try the ‘proper’ way of doing this now! Rebecca
My photography teacher had us do this for an assignment. Really neat trick!
LOVE IT! How did you get his face lit up so well?
Ewww, that’s just too tacky! Must say, I am not into this look in my pictures. Sorry
Cool! Thanks for sharing! It is appreciated! 🙂
Hey,Thanks for this wonderful tip. I want to try creating these during this holiday season. One question: should it be a black hard paper or any other color would do, as long as I have it close to the lens?