Featured Products
How to Shoot Amazing Water Droplet Macro Photographs
Want something fun to play around with when you’re stuck inside during these cold winter days? Try photographing water droplets from your kitchen sink! Though the results appear as “macro photography,” you do not even need a macro lens to do this fun activity.
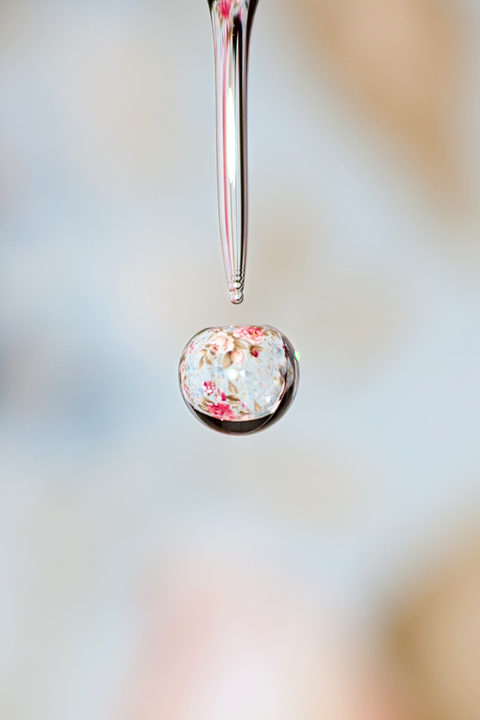
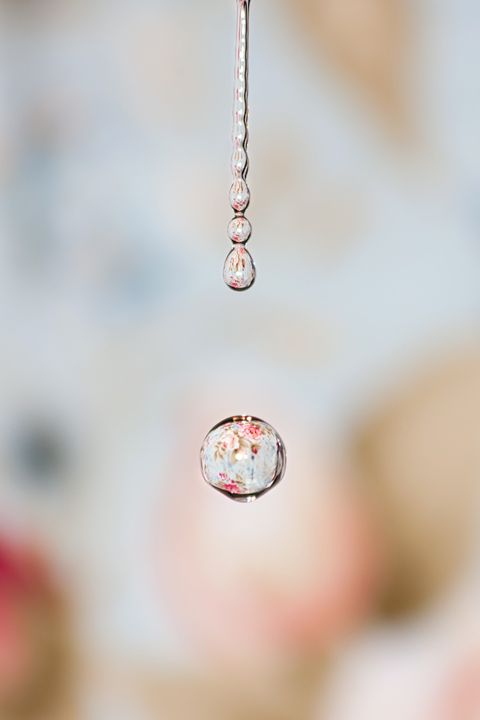
I used my trusty Canon 40D with the 70-300 variable-aperture lens and my 430EX speedlight set in automatic mode. You do not need this specific lens or camera, but this is just what I used. Here are some tips to help you get started.
- My settings on these were ISO 400 (it was a VERY dark & dreary day), f/5.6, focal length 300mm, and SS 1/125. I also used my remote.
- When setting up your shot, keep in mind that anything you choose to “highlight” in your droplet will be upside down, so if you care about the “up” or “down”, be sure to place your object upside down.
- Select a background with colors/patterns you love. I played with a couple of fabrics and objects, but I liked the colors/feel of this the best. It’s just a piece of fabric I bought years ago with the intent of making napkins. (Someday…) Dishtowels, cloth napkins, fabric, even small-ish toys or flowers in front of a backing of some sort—all of these will provide visual interest in your droplet. The world is your oyster! I think it would be fun to do it with a child’s drawing, too (though it might get splashed a bit). And with your object, don’t be afraid to go a bit larger than you’d think (I’d say anything up to about the size of a full-sized rubber duck)—the drop will greatly miniaturize your background.
- Remember that the drop itself will show a lot more than the small portion that forms the background of your actual image—the droplet is, in a sense, a fisheye lens and thus very WIDE. Before finalizing your set-up, be sure you zoom your LCD all the way in on the largest droplet you capture to be sure you like what you see.
- With regards to the background, I noticed while I was looking at the tiny image on the LCD that I didn’t like the “busy” of the pink you see in the first photo so I changed it for the bulk of my images, but on the computer later when I was editing them (after everything was put away, of course), I ended up liking the ones with pink much more (though, as luck would have it, my “best” drops were with the more plain background after I’d adjusted the fabric to minimize the pink—DOH)… I recommend, after you think you love it on the LCD, that you check out the basics full-size on your monitor to be sure before you really start shooting in earnest. Check to make sure that 1) you love the background, 2) you’re satisfied with the “fisheye” view within the droplets themselves, and 3) you’ve really gotten tack sharp drops with the background as soft and fuzzy as you want (by adjusting the aperture as necessary).
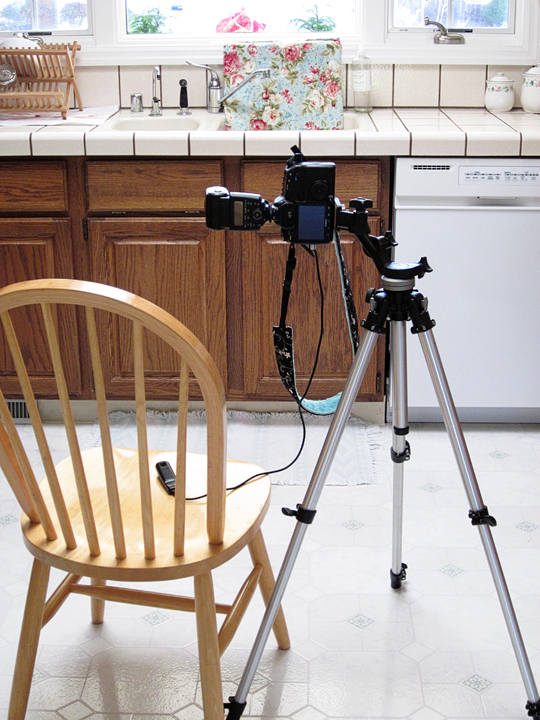
- For the basic set-up, I used a tripod, and remember if you use a tripod with an IS lens, turn off the IS. When you are on a tripod, the very act of the IS mechanism “doing its thing” can actually cause minute vibrations, and in a situation like this where you are zooming in very closely on a very small object, that tiny movement can make or break your sharpness. Especially if you are also planning to crop later, which I was.
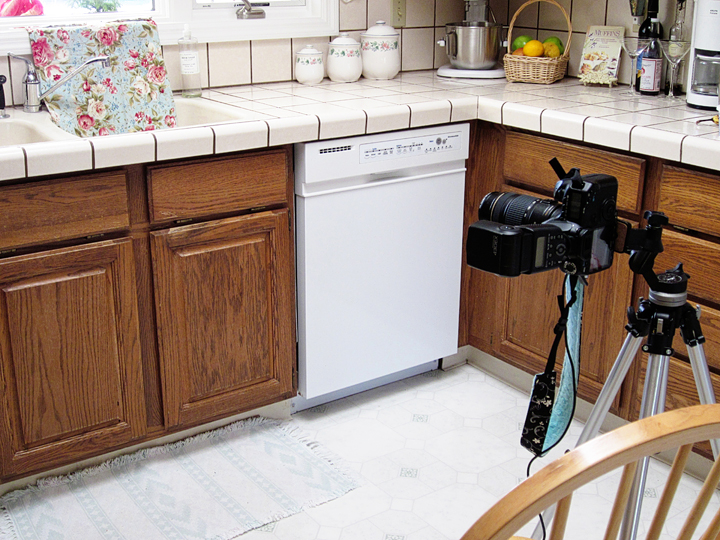
- I set my camera up vertically on the tripod, because that gave me the tiniest bit more wiggle-room in which the drop was still “traveling” within the frame. I used my 70-300 lens, and attached the speedlight. The closest this lens will focus is 4.9 feet, but that was fine because I wanted to use my flash to freeze the motion, and I didn’t want the flash so close so that it would overexpose the photo with my chosen aperture and SS. I also used my remote, though if you press the shutter gently and smoothly to avoid camera shake, that might not be necessary.
- I zoomed all the way in, and I used a high enough aperture (5.6) that the entire chain was in focus, but my lens was far enough that I also got a nice background blur at that aperture.
- Play with your ISO and aperture to get your exposure, sharpness, and background blur just how you want it. You might also need to adjust your flash strength up or down as necessary. I found a shutterspeed of 1/125 to be just about perfect (oddly, any higher and I got a “ghost” droplet underneath the main droplet).
My set-up looked like this:
Now for how to shoot the droplets:
- I turned the water on “low enough” so that it was just coming out of the faucet a drop at a time.
- I found the easiest place to focus was right where the water dripped from the tap. I toggled my focus point to the very top one and made sure the camera was situated precisely so that my selected focus point was RIGHT where the water droplet came out from the tap. I used back-button focusing (manual would work as well) in order to separate focusing from the shutterclick so the camera would not attempt to refocus with each click (otherwise your background might end up in focus instead of your droplet). I focused carefully on that spot, and I did a test shot to confirm focus (zooming in all the way on the drop on the LCD). I didn’t touch the camera (since I was using the remote) or refocus again after that.
- Pre-focusing is also important because the timing becomes crucial for this type of shooting, and even a fast lens often will not be able to achieve focus on a moving drop before the droplet is long gone. Also, because I wanted these to be really MACRO, I knew I’d be cropping quite a bit, which inherently reduces sharpness a little. That meant that achieving sharpness SOOC was crucial.
- Once I achieved focus, I used my remote partly so I wouldn’t have to keep my eye glued awkwardly to the viewfinder and partly so the camera would not move AT ALL. (I was sitting beside my camera/tripod on a chair, so my eye was at about the same level as the camera.)
- Timing-wise, I waited until the drop coming from the sink looked the fullest but just BEFORE it dropped—I found that my split-second delay was just about perfect for catching the actual drop that way. But having said that, it’s HARD to get just the right moment, and I took dozens and dozens of shots to get a handful I really liked. It was like a game though, and it was fun! And even when I nailed it, still some droplets were less “pretty” than others.
Here’s an SOOC shot, uncropped:
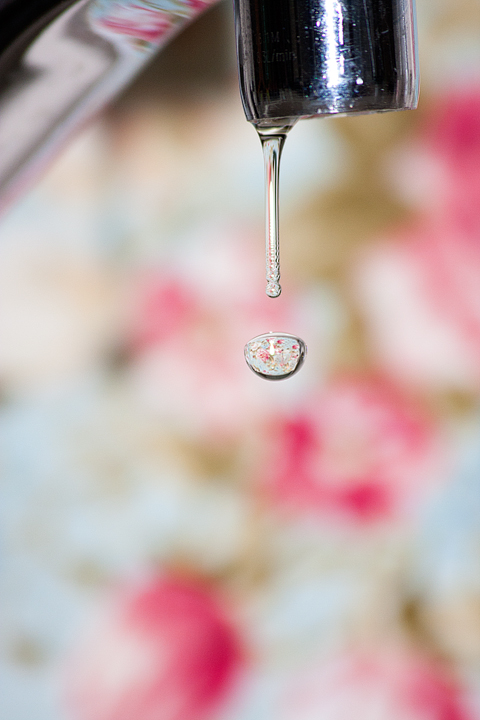
Most importantly, have fun! I love that photography can capture a split moment in time for us, enabling us to really see the beauty in things that normally slip past unnoticed.
Jessica Holden is a San Francisco Bay Area photographer specializing in children, families, and capturing the everyday moments and ordinary things that make life unforgettable. Her work has been featured in the book Inspire (cmbook Volume 1, 2010) and Click, the Official Magazine of ClickinMoms (Winter 2011), and her work can be viewed online on flickr.
No Comments
Leave a Comment
You must be logged in to post a comment.




Thank you for sharing…this is a fantastic tutorial and your pictures and simple and fabulous …can’t wait to try this!
I LOVE THIS! Great tips!!!
This is going to be fun. It beats me hanging a bag of water with a pin hole from my ceiling ….now to go get set up
Love this! Thanks for showing us behind the scenes. Have you tried it without a flash at a higher ISO?Just curious!
Thanks, I need something to do today. 🙂 And this is the best tutorial on doing this that I have read…or maybe I have read so many that I am finally getting it. But I think the first is the case.
OMG! I spent hours trying this exact shot last night (well, minus the cute fabric)… I blogged about my kitchen sink. If only I waited a day! I’m not completely satisfied with my sharpness (ISO400, ss 1.6, f/1.8, focal length 50mm) so I might need to try it again with your settings. I think I need to speed up my ss and close down my aperture. Thoughts?
Thanks for the fun lesson! I’ll have to try this soon. I love your fabulous attention to detail, that is so very important. Thank you for sharing!
Great shots! Also, off camera flash with remotes can give a nice look.
Can’t wait to try this! Thanks so much for sharing!
I can’t wait to try this today! Looks like a lot of fun.
This looks awesome!! I’m going to definitely try this over the weekend 🙂
I just did this a few days ago! LOL. I used a macro converter though because I don’t have a 300mm lens…
Fantastic tutorial! Congrats on being featured on MPC Jessica!!!
wonderful tutorial,thank you for sharing !
Those came out wonderful! Great detail. They are really fun especially once you get your timing down! I’ve done one with an image of something behind the drop. The key to that is to remember to turn it upside down because the refraction in the water is inverted. here is one I did with my son’s notebook that had SpongeBob on it. http://www.flickr.com/photos/22467834@N08/3390153607/
Really cool. I kept getting the shadow from the faucet in mine!
Cathy, LOL–that’s what I tried at first too–never managed to get it to work out!Melanie, I didn’t try it without the flash. My 40D doesn’t handle noise well at high ISOs, and the shutterspeed would have to be REALLY high to stop the action of the water–it moves FAST. I don’t think it would work with my camera. But I think the on-camera flash would have worked just as well, come to think of it, though it might cast a shadow since it aims so straight on.Annette, SpongeBob–FUN!Phyllis, I am not sure why I didn’t have a problem with this. Possibly you could adjust the aim of the Speedlight a bit to get the shadow to move out of the frame, or at least move closer to the edge of the frame so you could crop it out in the final image. I think too that I might have been zoomed in a bit closer than you were. I LOVE your shot, though, and the fabric is so pretty!
Thanks for this…I’ve tried doing this before but it didn’t work out very well, I will be trying again. I just need a better and more sturdy tripod.
I tried. Didn’t nail it today but with no tripod and 30 seconds I’m on my way.julie
Thanks for posting this!!!!!! I’ve been wanting to toy with some macro water shots for some time now. I am picking up a macro lens next week, but in the meantime, I may have to try this out with one of my other lenses. 🙂
Fabulous! I was looking for something to do for a series assignment in a class and this is it!
Thank you! What a great tutorial! I’ve tried this in the past, but never with a cool background. That was very fun!
I forgot to attach my image. I’m old.
Love this tip! Cannot wait to try it out, thank you!
my problem is the cropping but keeping image crisp..
what a lovely output!!! nicely done!!!! thanks for sharing the tutorial!!!!
Thank u so very much for this how to with all the real behind the scenes shots. I can’t wait to try this. I love the magic of photography
Love your instructions.Very impressive.
Awesome tips that I will have to try. My approach is listed at http://www.great-photography-tips.com/Photography-Tips-Water Drops.html, but I am always looking for new ways to shoot. Thanks!
Thanks for the great instructions but i always get two or three white dots in my water drop like some i seen posted here, anyone know how to fix this?? Thanks
Beautiful! Thanks for posting the tutorial!
Thank you Great tutorial:) I have a Canon powershot SX10IS and im a newbie at using the manual mode, im having trouble making the background blur enough to make the drop stand out? and i keep getting the ghost drop? what am i doing wrong? but still lots of fun trying this out:)
Thank you for this tutorial. Loved the experiment – still lots of practise required though!!!
Thanks for the great tutorial..I use a Nikon D80 with a 40mm 1:2.8 lens with no tripod and no remote…
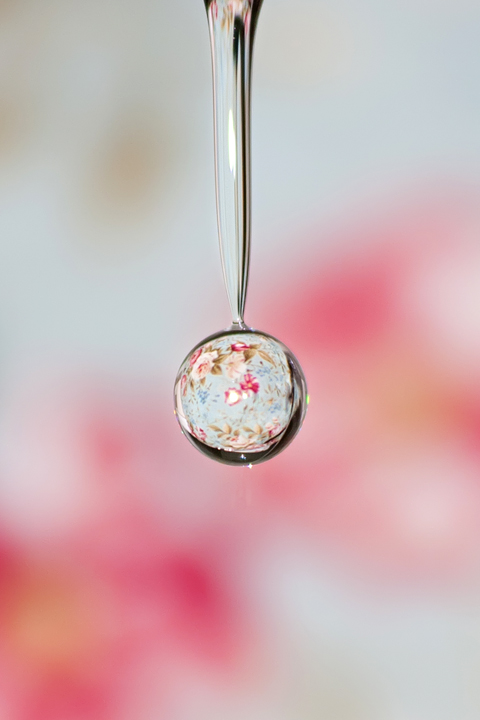
Here’s another one I did using your tutorial..