Featured Products
How to Edit Butterfly Images in Photoshop
I love photographing wildlife of all sizes. From photographing bears to deer to butterflies and birds, it’s amazing to watch and capture living things.
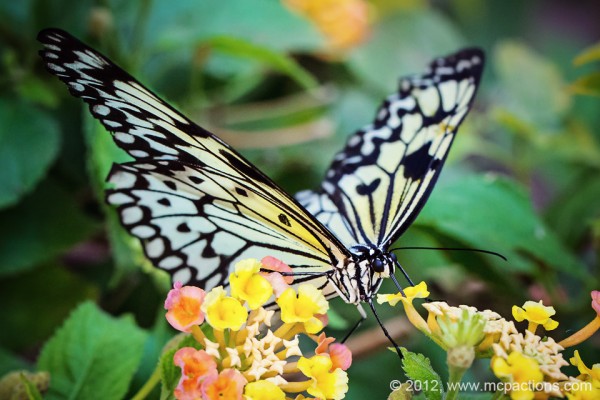
The image below was shot with my Canon 100mm 2.8 macro. What an incredible lens. This butterfly was photographed in low light. So while I wanted to have more depth of field, I was already at f8, I did not want to boost my ISO any further than 3200 (where it already was). My speed was 1/100, which was fine for a butterfly perched on a branch. I only used ambient light, no flash.

The edit:
The before shot was well exposed but lacked some of the color that existed in real life. I used the Summer Solstice action set to bring back the true colors and sharpness that I saw with my eyes when capturing the image.
- Ran the standard strength of Summer Blend action (which applies the Summer Solstice Base + all the looks from the set). You simply turn on any of the tones you want. I choose to turn on Beach Bash (40%), Campfire (35%), and Oasis (25%).
- Next I ran the Clarif-Eye action to sharpen the eye area of the butterfly as well as some of the details on the wings.
- Lastly I cropped. I tried two different crops. Which do you prefer? Crop one focuses on the entire butterfly. Crop 2 changes the focus to what the butterfly is doing. Add your comments below and let us know what you think.
Here’s my favorite:
I was torn on which crop I liked best but for me this one wins because I love the wings.


